This is my 50th blog post since I began just over a year ago. I decided to start blogging during the summer of 2015 but it took a while to get going. Whilst it can be a fair bit of work each week, I've had some lovely feedback from friends and strangers.
With Christmas close, I thought I'd share a decoration I've made with a few friends recently. So, delve into your Christmas stash and pull out two contrasting Christmas fabrics. Use a saucer or something similar and cut out two circles of fabric. Place right sides together.
Next, stitch around the outside with a narrow seam, remembering to secure the start and end. Leave a gap to bring the fabric right side out.
With the fabric right side out, press and manipulate the gap with your fingers/iron to make sure it's flat and 'round looking'. Top stitch around the piece close to the edge. There is no need to hand stitch this to close up the gap. Trim off all loose threads.
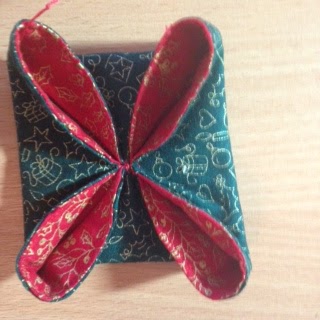
Using a needle and thread pull together the north, south, east and west points like this
Then, place the fabric onto a flat surface and press it flat.....
Once flat, bring over the outside part of the 'petal' so that it lies flat, a bit like turning over a collar. Press it flat with your hand. To finish, add a loop to hang it on your tree and either stitch a pretty button the centre (this neatly covers your stitching) or, like me, get out a glue gun and add a 'card topper'. I bought mine from Hobby Craft.
So here are some of the results:
The above decorations were made by a group of ladies who meet
each week at Cherry Hinton library and the ones below made by Lottie (aged 12) and Joanna, her mum.
As I await my guests, all the food is bought and presents are wrapped. I hope all is well with you.
Happy Christmas


